Making Jewelry Photos Stand Out with Luxury Jewelry and Model Editing
It’s challenging to imagine how a piece of jewelry will look on you when shopping online. So what do jewelry businesses do? They work with models to help customers see their pieces and make purchases. But doing a luxury jewelry photoshoot isn’t enough. These photos also need refinement to make them appealing online.
These days, people need to see what they buy online. Attracting customers takes more than just uploading raw pictures from a photoshoot. That’s why photo retouching is a much-needed step in luxury product photography. This technique is a way to make images look better, resulting in a product photo that’s sure to boost sales.
Photo retouching is a creative, personal process that combines the collaborative effort of the model, photographer, and editor. In this article, experts at Jewelry Retouchers share their photo retouching process for an elevated luxury jewelry shoot.
Luxury Jewelry and Model Editing
Visual appeal is crucial in the jewelry business. That’s why jewelry photo retouching is necessary for jewelers to stand out from the competition. At Jewelry Retouchers, we take great care of every jewelry photo trusted to us. Our editors pay close attention to every detail, beauty, and accuracy in every picture.
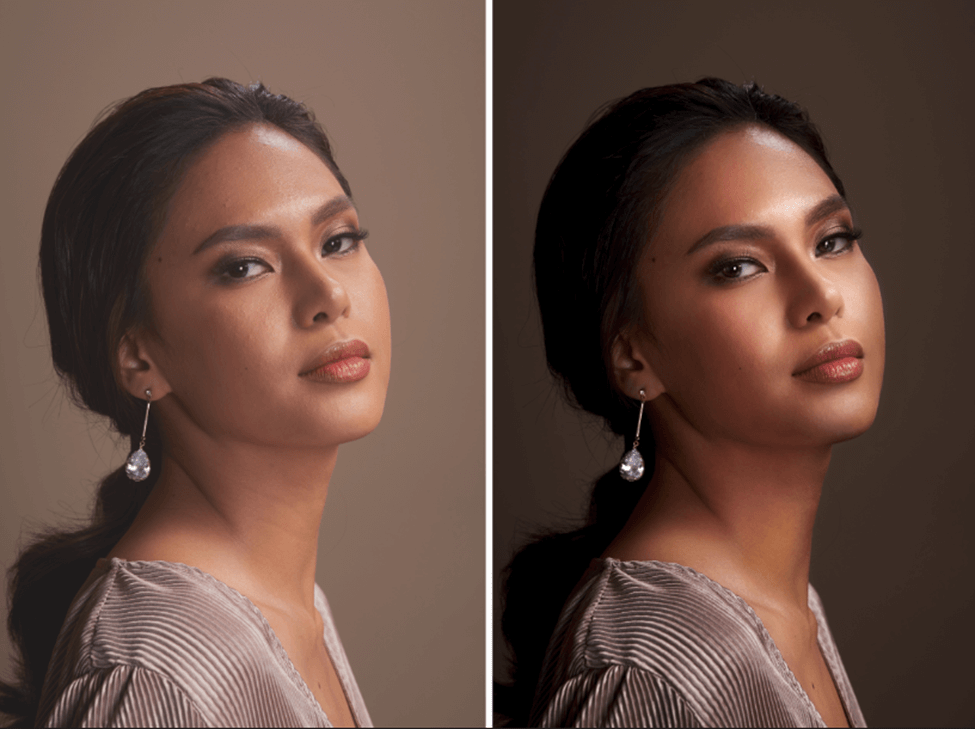
Take these before and after shots of a fashion model with jewelry as an example:
The original photo lacks drama and excitement. There is also a lack of details on the jewelry and dullness in the skin. In the edited image, the picture becomes more eye-catching and vivid, and the focus shifts more to the jewelry.
So, how did we do this?
In a nutshell, we refined the jewelry and the model through retouches via Adobe Photoshop. With our retouching process, we make small adjustments that elevate the image. The majority of our retouching process includes blemish removal and color adjustments.
Our Retouching Process
Retouching photos involves making adjustments to an image before it’s displayed in any marketing campaign. Because we want customers to know that what they see is what they get, our key objective here is to fine-tune a product image without making it appear overly edited.
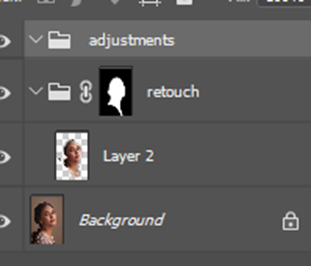
To start the retouching process, we create folders for each layer to make editing more organized. The “retouch folder” is for any cleanups we make, while the “adjustments folder” is for desired color adjustments. Assigning folders for each edit we do helps us keep up with several modifications.
Blemish Removal
Removing imperfections in a jewelry product photo makes an image look more appealing. For this, use Photoshop’s Healing Brush and the Clone Stamp tools. If an image has flaws, fix them using one of these tools by painting over it with a sample or pattern. Although the Clone Stamp and Healing Brush serve a similar purpose, the Healing Brush does better blending in the sampled pixels’ texture, lighting, transparency, and shading.
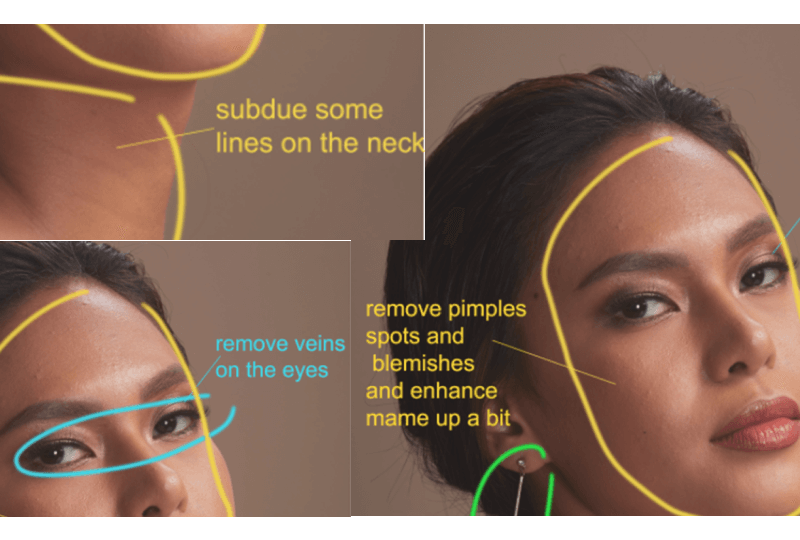
In this particular product photo, we removed noticeable veins on the eyes of the model, subdued necklines, and other skin blemishes to make the picture sharp and neat. Here’s how to do it:
Using the healing brush:
- Use the toolbar to find the Healing Brush tool.
- Set the brush options in the pop-up panel.
- To set the source sampling area, move the pointer to a part of your image and hold Alt (Windows) or Option (Mac).
- Click the button for the sampled source you want to use in the Clone Source panel.
- Drag anywhere in the picture. When you let go of the mouse button, the sampled pixels are mixed with the existing pixels.
Using the clone stamp tool:
- Find the Clone Stamp Tool in the toolbar options.
- While using the Clone Stamp, bring up the crosshairs by holding down the Option (Mac) or Alt (Windows).
- Click on the spot you want to use as a reference point for your touch-up work.
- Once you have your sample, use the drop-down menus at the top to change any brush settings you want, such as brush size, opacity, blending modes, and so on. Then use your brush to paint over the area you want to fix.
- Adjust your sample in the Sample menu until you’re satisfied with the refinement.
Color Adjustments
Since our clients are jewelry businesses, our editors ensure that the jewelry will still be the center of attention. We do this by giving the products a splash of color so that they shine even in pictures.
Here’s how to make adjustments in Photoshop:
- Access the Adjustments panel and choose the appropriate tool for your preferred adjustment.
- For tone and color, choose Levels and Curves.
- For color adjustments, select Color Balance or Hue/Saturation
- For turning images to black and white, choose Black and White.
- Make necessary corrections by using the adjustment sliders.
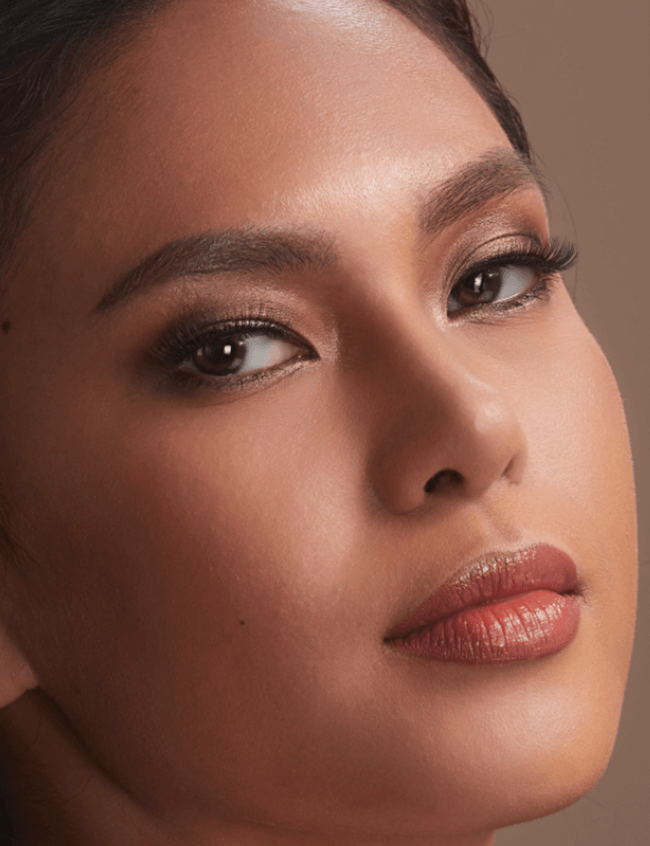
Our editors also keep the skin realistic and detailed using color adjustments. In the image above, we’ve enhanced the model’s makeup and given her eyes a glow to give texture to the picture.
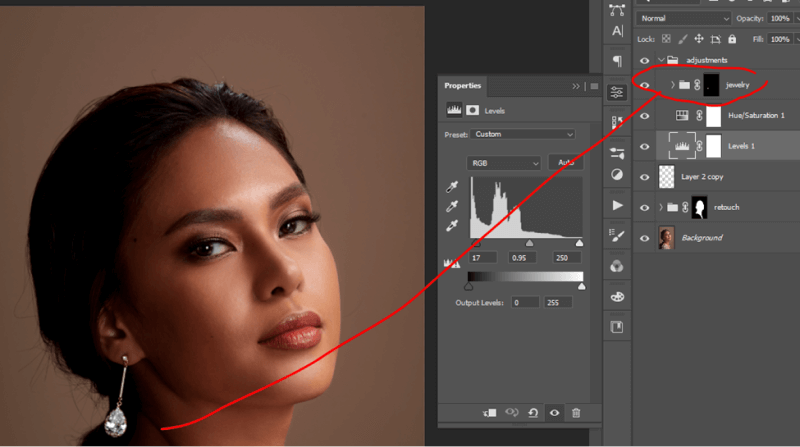
We used an overall contrast and color toning to make the jewelry colors stand out. Our editors also adjusted the jewelry’s brightness to neatly show the diamond’s details. By shifting the jewelry’s hue, we were able to draw more attention to it.
Make Your Jewelry Product Photos Shine With Jewelry Retouchers
Retouching jewelry product photos is an excellent strategy to put into practice. It not only benefits the jewelry business online, but it also helps customers with their buyer journey.
Blemish removal and color adjustments are only some of the best practices for photo retouching. While you can get many other skills, we suggest focusing on these first. They might be minor retouches, but completing them makes your product images much better.
Ready to give your jewelry product photos the attention they deserve? Feel free to contact us today for a free demo!