The Art of Making Diamonds Sparkle in Diamond Jewelry Photography
Diamond jewelry photography is one of the most in-demand areas in product photography – especially because jewelries are meant to exude unmatched brilliance to catch the attention of customers. At Jewelry Retouchers, we get many inquiries to edit diamonds and other gemstones, most of which are diamond engagement rings or wedding bands. If you’re a beginner in diamond jewelry photography, and you’re planning on learning how to make diamonds sparkle more regardless of the quality of your photos, then you’re in luck.
In this article, we’ll explain the general steps taken to edit and make diamond jewelry images stand out with brilliance. As experts in the trade, we’ve learned the ins and outs to achieving the best jewelry photography output – and we’re ready to share them with you today.
What Is Diamond Jewelry Photography Editing?
Diamonds – the indestructible little rock everyone drops their jaws over. They’re such tiny objects bursting with light reflected hundreds of times over, and with a slightly different color bouncing each second you look at it.
From the sheer rarity that diamonds are, it comes as no surprise that people love to stare at them – and each time it feels like they’re discovering a new color, cut, or reflection even after years of owning one piece of diamond jewelry.
Now, freeze time. Take a photograph of a piece of diamond jewelry and see how dull it suddenly becomes. There can be dust on it that you never spotted before, some of the deeper cuts that can’t be seen because it’s tilted one way, not the other. The very soft color bounce disappears. It’s either too dark or too bright. And sometimes, the metal underneath takes away the shine of the diamond because it lends a darker background.
So many errors just from one single photograph of a diamond jewelry. Unfortunately, even the most professional photographers can’t bring you that authentic diamond dazzle. This is where diamond jewelry photo editing comes in. This niche photo editing type specializes in bringing the shine that ordinary jewelry photography typically lacks. From cleaning up minor jewelry imperfections to boosting the brilliance of different types of gemstones, diamond ring jewelry ring editing can lend even the best jewelry shops, and makers stand out even more.
To help you understand how diamond jewelry editing works, here is your step-by-step guide to correcting your best diamond shots:
1. Clean dust or dirt that may have been captured on the image
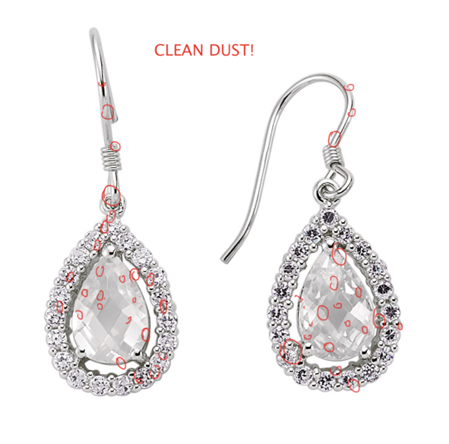
We begin with a digital sweep of the stone, removing any dust and scratches that might exist. Dust clings on to everything so don’t be shocked if your 3-karat diamond all of a sudden looks like the inside of a vacuum machine. That’s completely normal. The good news is that this can easily be corrected with the help of Photoshop. To edit your diamond jewelry and remove these imperfections, you can try using the healing brush tool or the clone stamp tool. Just make sure that the blurring effects of these two brushes don’t warp your images too much!
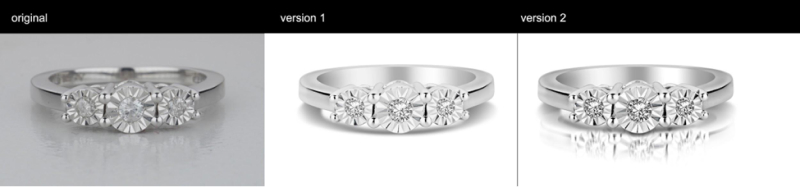
2. Adjust your base levels and curves
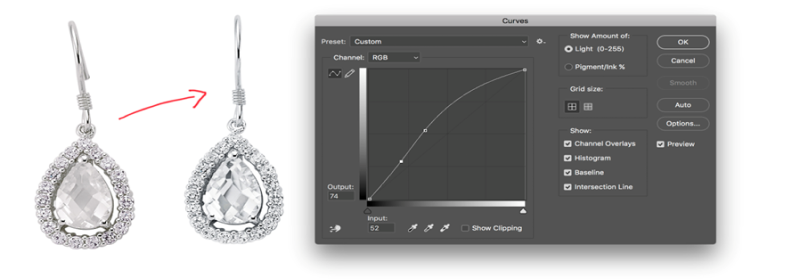
After dust removal, we’ll do a little play with some Photoshop adjustment settings like levels, curves, selective color, hue and saturation, and channels to see how far we can edit this stone without breaking it. By “breaking,” we mean that the stone retains its beautiful cuts and does not become overly bright suddenly. You can move these settings around until you get just the right shimmer and color to make your diamonds stand out and sparkle on the image. To see how effective your diamond editing adjustments are, don’t forget to keep a “before” image just so that you have a point of comparison.
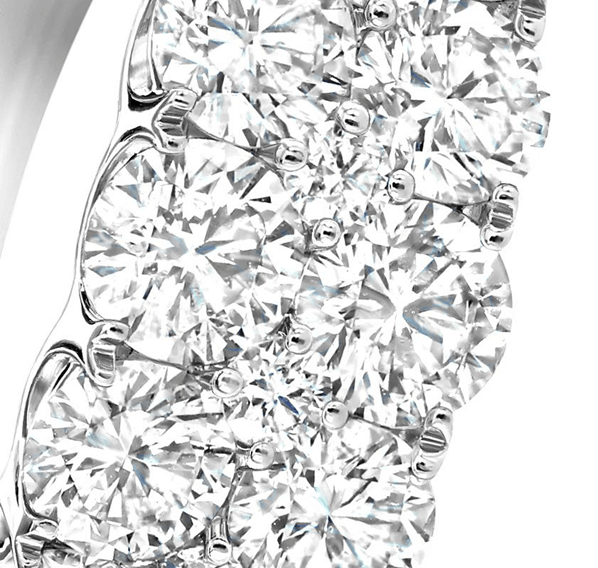
3. Mask over your diamonds’ cuts

Now it’s time to inspect the cuts carefully and see how to enhance them. Our human eye can see the cut in seconds, but unfortunately, the camera might miss a few important lines in the diamond.
Select the cuts one by one and either brighten up one area or do very gentle painting over that area. The cuts of the diamond can have hundreds of polygons. Our job is to have a thorough look through it and trace over it, then spark it up some more.
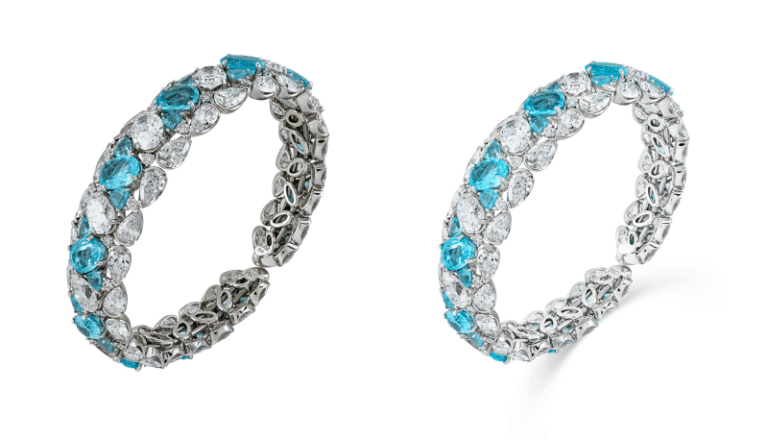
4. Preserve the unique color of your diamonds

This is probably one of the trickiest parts of the image. Look at a real diamond, and you’ll see a rainbow-like hue in there. Diamonds also sometimes reflect more blue, pink, or yellow, depending on what type you have. Just as a rainbow has many colors within a limited space, so does every cut of the diamond. To capture this unique color during the diamond editing process, we will normally need to add the color manually and paint it inside a few select shiny cuts of the gemstone.
5. Finish up with final top diamond editing adjustments
Then we do our very final diamond jewelry photography adjustments, including sharpening, adjusting the contrast, and fixing the overall color balance and exposure.
Wait, we’re not done!
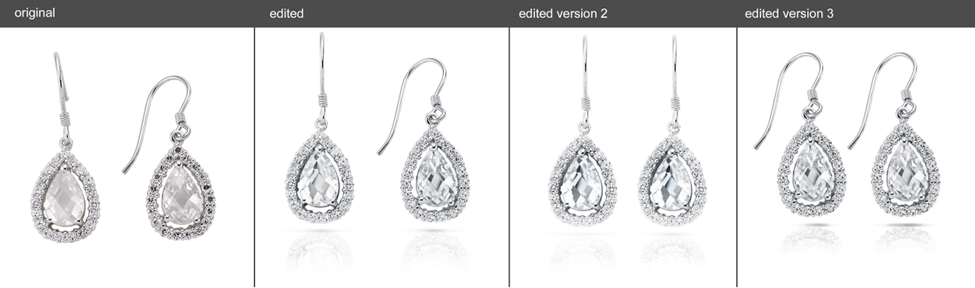
- Show the work to the client – jewelry retail clients all have their own opinion on what they think looks best. We’ve had clients who prefer their product images bright, while others like the more natural approach. Others insist on blue tints while others insist on it being almost all black and white. The final finish of editing diamonds is subjective, so keeping an open mind as a diamond jewelry editor is absolutely necessary.
- Last and hopefully the final step – adjust all your edited layers to match the style the client wants best.
How long does diamond jewelry editing take?
Getting the first diamond edited for online shops is normally the longest since we must wait for the exact style needed. It can take about 3 to 5 hours. But then, when we apply that same technique manually to the other similar images it can be reduced to about 2 to 2.5 hours. Fortunately, however, there are numerous experts out there that can offer fast editing experience, like Jewelry Retouchers. Remove the guesswork and let us handle your diamond jewelry editing. Contact us today and explore your editing options so you can deliver brilliant and gorgeous jewelry product images from the get-go.